Soil Blocking is a great way to start many seedlings in a rather small space. In the post we are going through all the aspects of why soil blocking is my preferred way of seed starting, what soil mix has worked well and how to water the seedlings.
What is Soilblocking?
The name gives it already away: It is blocks of soil which you can use to start your seeds. If you liked mud pies in the playground, when you were young, soilblocking is for you. It is the same concept, a soil mix is going to be pressed in shape and serves as the vessel to grow your garden seedlings until it is time to plant them outside.
Advantages of Soil Blocking
1. Space Saving
The 3/4" Mini-Blocker allows you to start 20 seedlings in a space as tiny as 2 credit cards next to each other. A lot of flower seeds are really small and don't need a big pot to thrive in the beginning. A lot of flower farmers even leave them in the small blocks until they are ready to be planted out to maximize growing space.
2. Stronger Root System
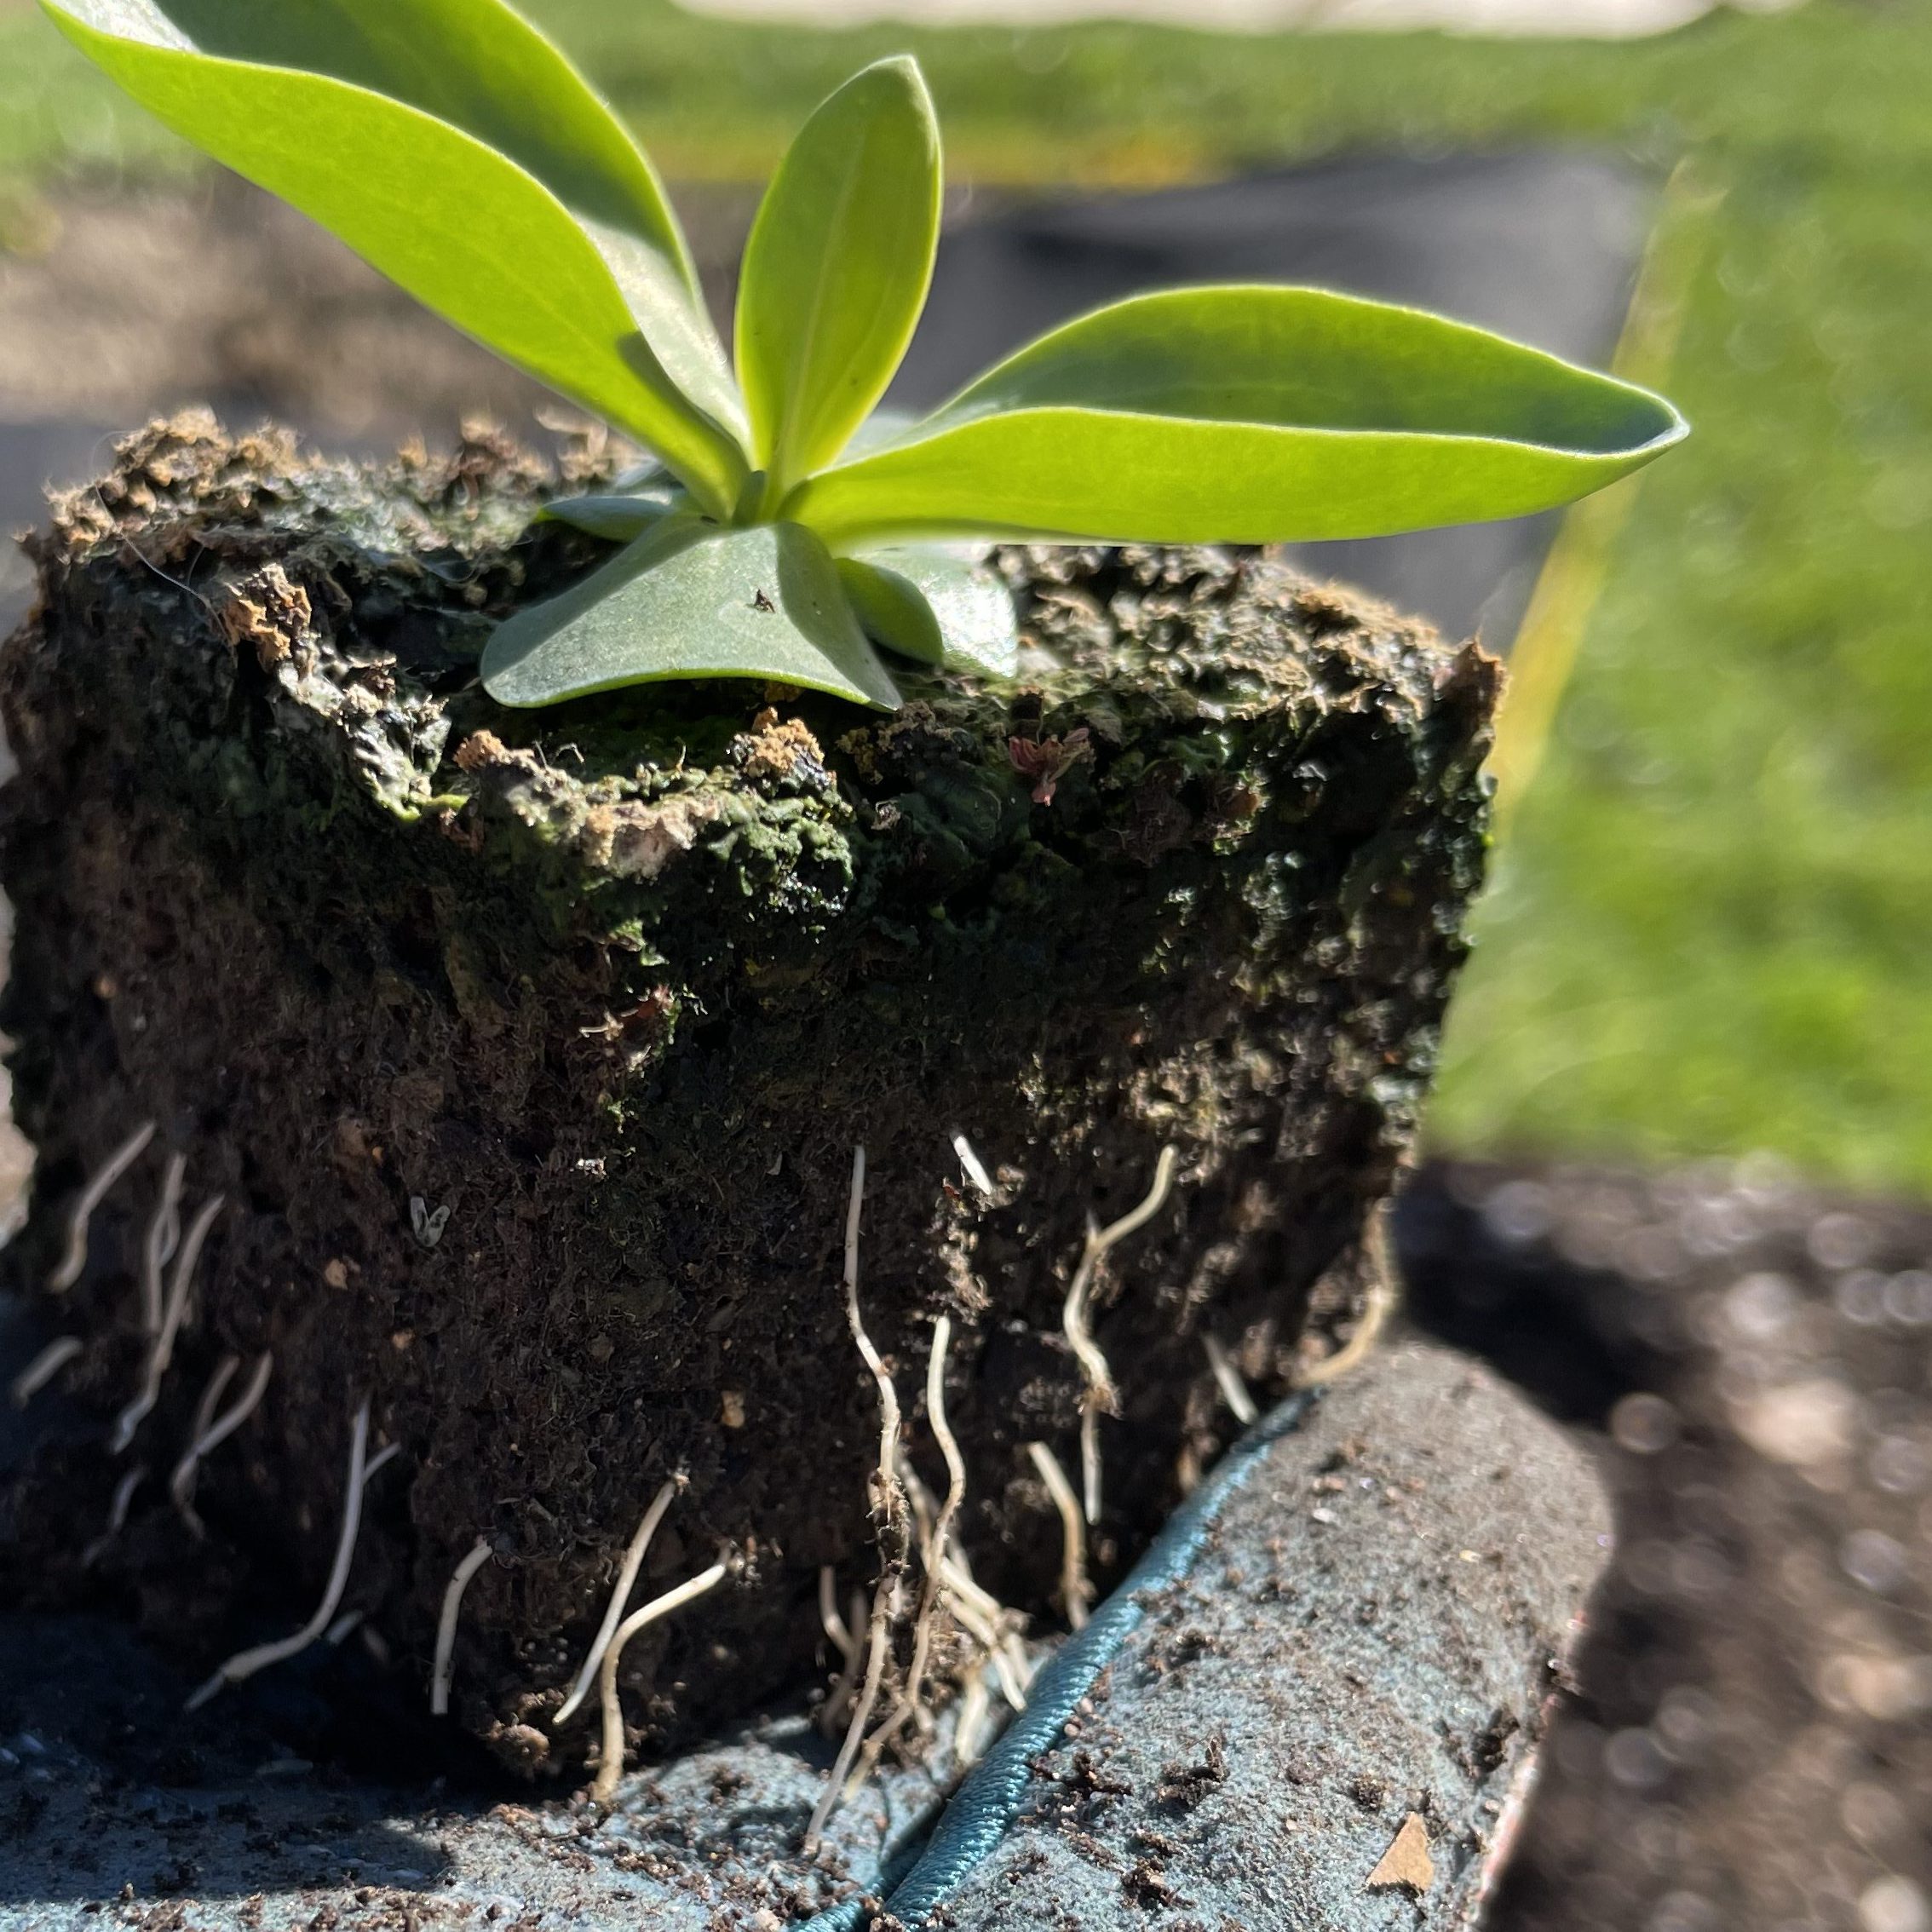
Once the roots hit the end of the soil block, they air prune, which means, the seedling directs its roots back into the block. This results in stronger and more dense root systems without the risk of root bounding.
3. Less Plastic = Less clean up
And last but not least, soil blocking uses a lot less plastic pots! And if you ask me, anything what makes the clean up easier is welcome. I always dread the clean up after seed starting season and rarely get it done before November hits. And I wish that statement was an exaggeration. It is not. 😉
What do you need for Soil Blocking?
You need a soil blocker, a soil mix that is suitable for soil blocking and a tray with a flat bottom for your soil blocks.
(This post also contains affiliate links that help support my content creation efforts. I greatly appreciate your support)
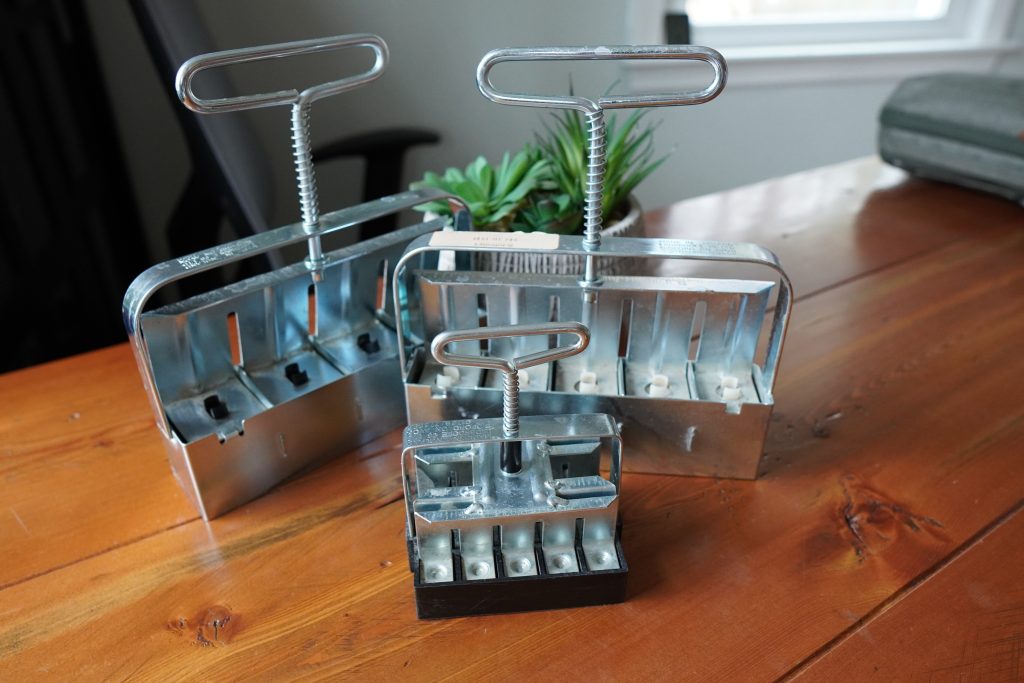
1. Soil Blockers
There are 3 most commonly used Soil Blockers:
- 3/4" Mini Blocker (20 blocks)
- 1 1/2" Blocker (5 blocks)
- 2" Blocker (4 blocks)
You can also get inserts for the 2" blocker and use them to upgrade the 3/4" blocks, if they need more space.
2. Soil Mix
This is the most commonly asked questions, when you talk with other gardeners about soil blocking: What is your soil mix??
I use the soil mix which Lisa Mason Ziegler aka know as the Queen of Soil Blocking, recommends on her website expect that I use the peat-free soil medium PittMoss Plentiful instead:
- 16 cups of sifted PittMoss (or peat-moss)
- 4 cups sifted Compost - I love Coast of Maine - Lobster Compost
- 1/4 cup Greensand
- 1/4 cup Rock Phosphate
Add all ingredients together and mix them until it looks like homogeneous soil medium. I also recommend to make a large batch at once, so you have it ready when you need to start seeds or bump them up into bigger blocks.
When you are going to use the mix, hydrate the soil mix in a 3:1 ration: 3 parts soil mix to 1 part water.
3. Trays and other helpful Equipment
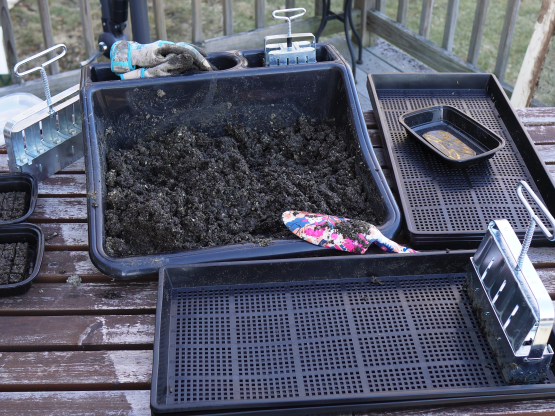
Soil blocks require trays which are flat on the bottom, so they can be water evenly and don't tip over. I usually use a microgreens mesh tray as the tray to put the blocks on and have a watering tray underneath. When you go with the shallow microgreen trays, you can also assure proper air circulation for the soil blocks. Good air circulation is key to avoid any fungus issues with your seedlings.
I also recommend to get a soil sifter or build yourself one. It is key for the soil mix to use sifted soil and compost. DO NOT skip the sifting step or your blocks won't hold up.
And lastly, it is helpful to get a paint scraper to scrape off excess soil mix from the blocks before you press them. This usually results in more evenly sized blocks. You can also use a trowel to scrape it off, but the scraper itself is just a more clean and fast way of doing it.
How do you soil block?
The correct hydration of the soil mix is important. Not enough water in the mix is the typical beginner mistake which causes the blocks to crumble away. You have a quality soil block if you can pick it up and bounce it gently in your hand without it falling apart.
I also recommend to let the soil mix sit for a couple hours after you added the water. This helps for the soil to soak it all up and it gets a little bit easier to handle.

Once the soil mix is sufficiently wet hydrated and move your blocker of choice through the soil to fill it up with soil. I usually like to hill up the soil in my potting tray and press the soil blocker down to the bottom of the tray to fill the chambers up to the maximum. It is the same concept as you know from your childhood when you were doing mud pies in the sand box. 😉 When the soil blocker is filled with soil, scrape off any extra soil on the bottom, so it is one flat surface.
Place the loaded soil blocker in the tray and press down the handle while you pull up the soil lever (see picture). This creates the best quality soil blocks.
How to seed soil blocks?
Once the soil blocks are pressed into the trays, it is time to seed them. I usually aim for one seed per mini block. If I know the seeds have a poor germination rate, I might do 2 per block. Soil blocks also lead to faster germination than other seed starting methods, I don't know the scientific reason for it, but I can confirm this statement. All my seedlings I started in soil blocks last year out grew their potted competition by a couple weeks in the end, which screwed with my transplanting timeline.
This year I am starting all my flower and vegetable seedlings in soil blocks, so I pushed all starting dates 2 weeks out compared to last year.
How to water soil blocks?
Watering soil blocks as a beginner can feel tricky, but it is not as difficult as you might think. The only important rules: DO NOT water them from the top. This will dissolve your blocks. I have a watering can with a slim spout, which I use to add water on the sides of the tray. I move the tray around a little bit to make sure all blocks got an equal amount of water. If the blocks wicked up the water too fast it is a sign to give them more, but you never want the blocks to sit in water. Who likes sitting around with wet feet? 😉
If there is water left in the tray after 15 min, I recommend dumping it out. This is where the microgreen mesh tray & solid tray combo comes in handy, because you can just take the bottom tray and dump the remaining water out. You can aid the moisture retention with a fine layer of vermiculite on the top of your blocks.
Keep a consistent watering schedule! Especially the mini blocks are going to dry out fast if you don't water them every day consistently.
Additional Resources
If you want to see a step by step guide for soil blocking you can watch my youtube video. And if soil blocking feels too complicated, how about to try out the easiest way to start seeds: Wintersowing.
Happy Seed Starting!