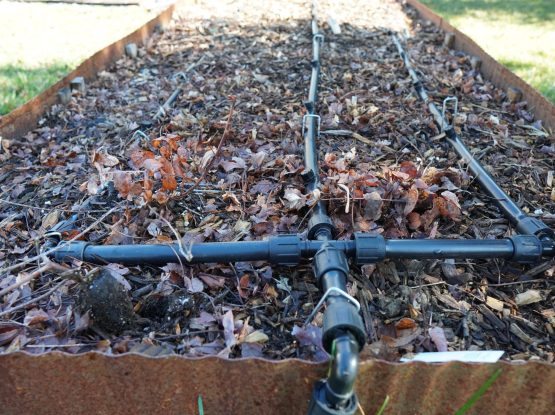
Irrigation Systems can be intimidating in the beginning, but once you understand the basics for your consideration, it is as easy and flexible as putting together Lego blocks. And who doesn't like to play with Legos?
1. Reasons for an Irrigation System
Let's discuss first the main reasons why irrigations systems are incredible helpful in any kind of garden.
a) Water Efficiency
Plants can take up water a lot more efficiently when they are provided by drip irrigation. A slow but steady drip can saturate the root system a lot deeper, than a fast flood of water provided by a hose.
b) Saves Water
With that said, this more efficient way of watering saves also a lot of water. No more run-offs over the side of containers or flushing the plants with large amount of water which rushes through the soil faster than the root system can absorb it.
c) The Laziness - Factor
And now my favorite argument, NO MORE WATERING by hand. 🙂 I hate watering. Yep, I said it. From the bottom of my heart, watering is my least favorite garden chore. I despised watering that much, that I installed an irrigation system since year 2 of my garden journey and I couldn't be more happy. Now I can manage watering over an app on my phone and run it on auto-pilot for most of the season with a program.
I learned a lot along the way of setting up an irrigation system for my garden space which I am going to share with you here.
2. How to get started
Understand your Space
Before you start anything, you need to ask yourself 2 questions:
1) Where is your water source/ faucet?
2) How far is the distance to area you want to water?
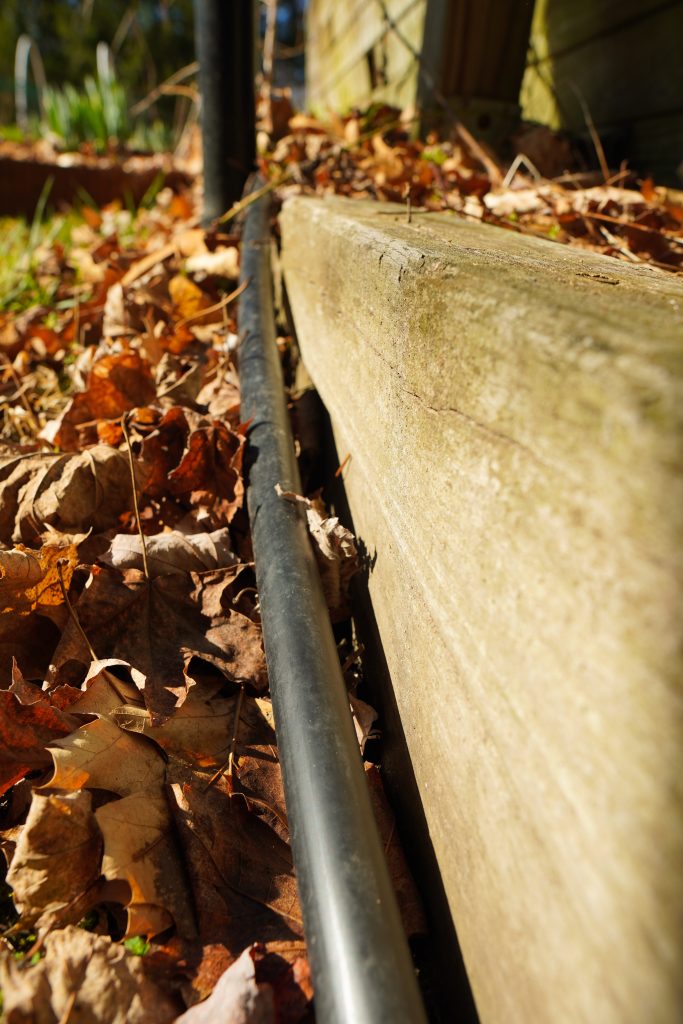
These are the two essential questions which can make or break your irrigation plans. The key to a successful irrigation system is to pick the correct main line for size of the irrigation system you need. The main line is your water supply line where all other lines get connected into. Therefore, it is key to have the right size for your need. Here are the most common supply line sizes and how far they can run:
- 1/4" line = 30 ft run length
- 1/2" line = 200 ft run length
- 3/4" line = 480 ft run length
- 1" line = 960 ft run length
Measure the distance from your faucet to your garden area and measure out how much distance all other lines should run as well. For example I had already a 160' main supply measured from the faucet to the furthest corner of my garden. After I measured also all additional supply lines I wanted to connect into it, I came to a total distance of 320' for my irrigation system. This was the information I needed to pick the necessary size for my supply line: 3/4" Main line.
Also consider if you are planning any future expansions as it would be a pain to exchange the main line after a couple of years to upgrade to a larger one.
Make a Plan
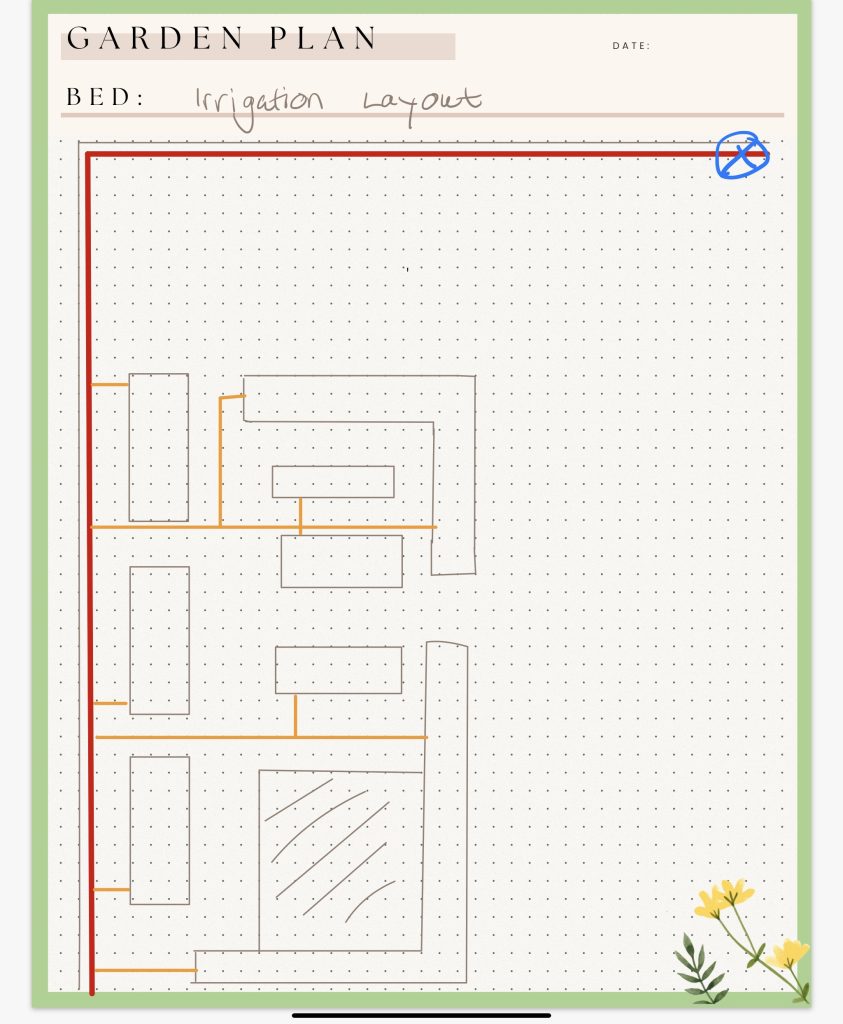
Once you measured everything, make sure you create a plan, where you want to connect into the main line (red) and how you want to bring water to your garden beds (orange). This will help you to understand how much supply line you need to order and how many different connection pieces (Elbow -, Tee-connectors, etc.) you need.
You can also see that I have 2 supply lines for my 2 large L-shaped flower beds. This helped to distribute water faster through the system to ensure that all areas get watered the equal amount of time.
3. Materials & Tools needed
(This section contains affiliate links. Thank you for supporting my content creation efforts.)
One thing which you will learn very quickly once you start working on your irrigation system: You need more than you planned. So calculate some buffer for mistakes and areas you might haven't thought about. I recommend to calculate a 15-20% buffer in. There is nothing more annoying not able to finish the setup, because you run out of supplies and have to order more.
My main source for all Irrigation Supplies is DripDepot. They have a great selection of materials and the best prices around. Don't get turned off by their slightly outdated website. They have great resources in their Help or Learn section and an amazing customer service team.
Water Supply Lines
There are different materials you can choose as main line, I decided to go with Poly-Ethylene lines for my main supplies, as they are the most rigid and lasting ones. For our New England weather here, I always look for materials which can withstand our winters as well as our summers.
I have 3 types of supply lines in my garden:
Once you get you main line, make sure you roll it out on a day before your want to work with it, ideally a sunny day. This will save you a lot of wrestling...
Drip Lines & Emitters
When it comes to drip lines and emitters, there are MANY options, which can be overwhelming. So, let's first discuss drip lines: Drip lines have built-in emitters with certain spacing (6",9", 12" or 18") and flow rates on how much gallons of water they would emit if you let them run an hour (GPH = Gallons per Hour).
The difference between Drip Lines and Drip Tape
You might have heard also already about drip tape; Drip lines and drip tape are very different lines. While drip lines are sturdy poly-lines, which you can curve and bend the way you need them, drip tape can only go straight. It is more affordable if you need to supply large straight areas like planting rows, but for the home gardener, I think drip lines are the more flexible option. They also operate on the same water pressure (25 PSI) as the main lines, while drip tape runs on 15 PSI water pressure and would require additional pressure regulators.
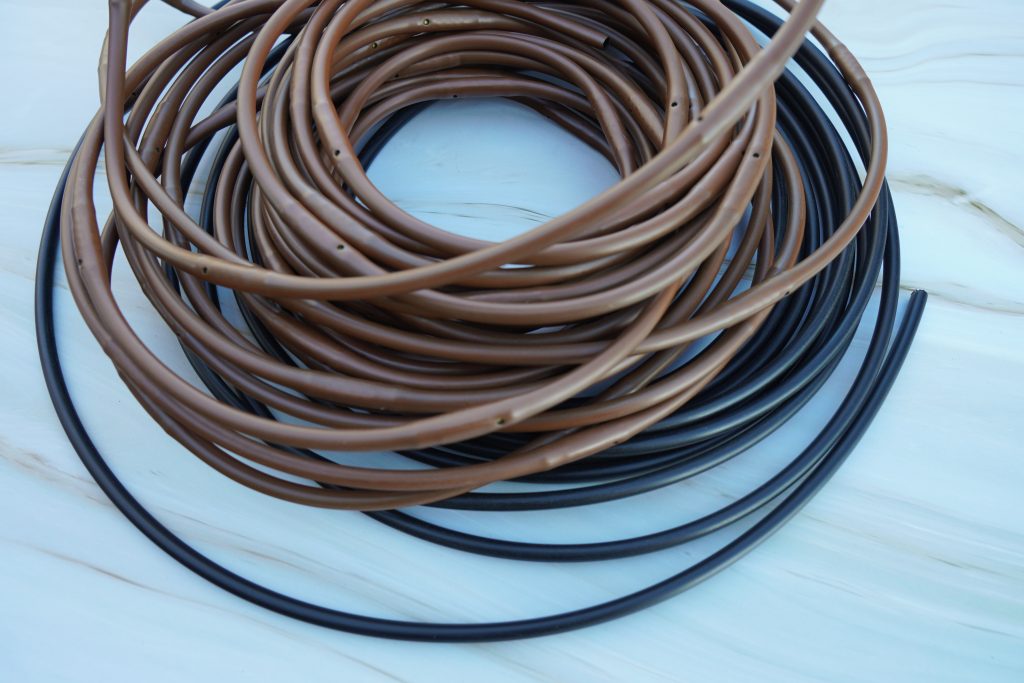
For my garden, I chose to use drip lines with emitters every 6" (brown line). I plant out my garden rather dense, so I need to make sure that everything gets the water it needs. For my grow bag garden and all my containers, I also use a 1/4" poly supply line to get the water, where I need it and add an emitter to the end. You can see in the section 4 examples on how I have set up my garden and containers.
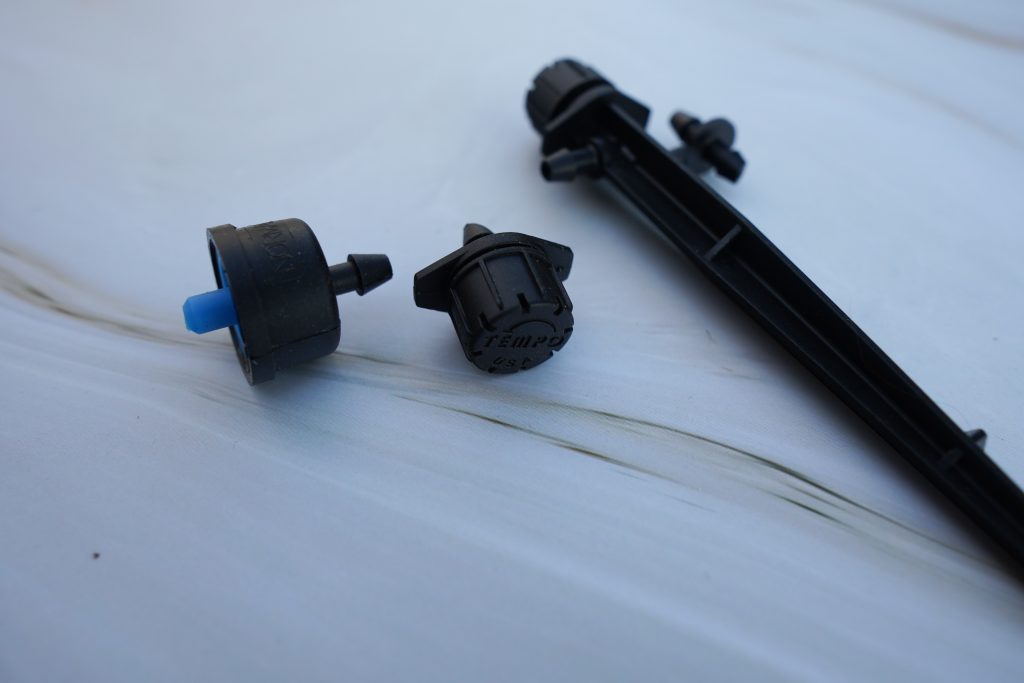
Now let's discuss emitters: Emitters are little attachments or connectors which emit a certain amount of water per hour. After testing out a number of them through the seasons, I prefer to use these 3 types:
- Fixed 0.5 GPH Emitter (on the left): I use this one for small container where I only have one plant
- Adjustable in-line 360-Emitter (middle): I use these ones for my cut-flower beds, to be able to adjust to the water needs of different plants.
- Adjustable 360-Emitter, end-of-line (on the right): I use this one for all my grow-bags and larger containers.
Connectors
The last area of parts needed are connectors and maybe tubing valves to be able to shut off certain areas of the garden as needed. For example I have a valve at every tube going into a garden bed. This helps in the shoulder seasons of Spring and Fall to avoid that you are watering areas, which don't need watering anymore.
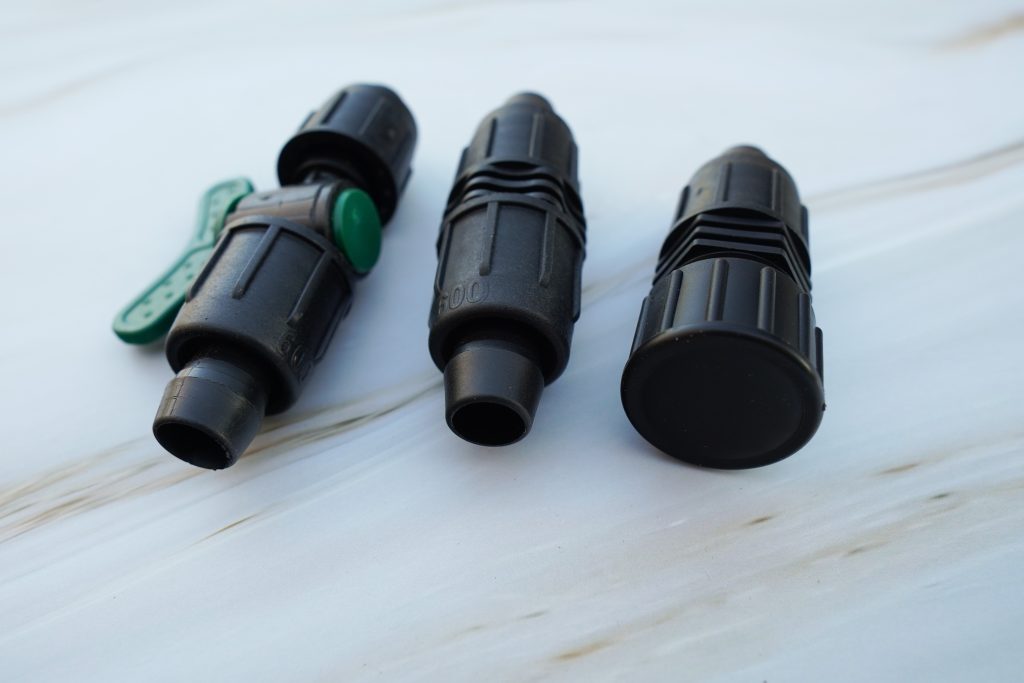
For the selection of the correct connectors it is important to know which size of supply line you are using. I use in my garden all sizes from 3/4 inch tube, over 1/2 inch tube down to the 1/4 inch tube. For my 3/4 inch main line, I counted the amount of elbows , Ts and end caps I needed. I always recommend to have some couplers at hand in case you accidentally cut into a line. Trust me, that happens more often that you think. 😉 And there is nothing more annoying than not being able to run your easy & flexible Irrigation system, because you are missing a part and have to order it first.
I use for all 3/4" and 1/2" tubing the Irritec Perma-Loc connectors. You can install these without any additional tools and they make it easy to replace or change up the lines if you have to.
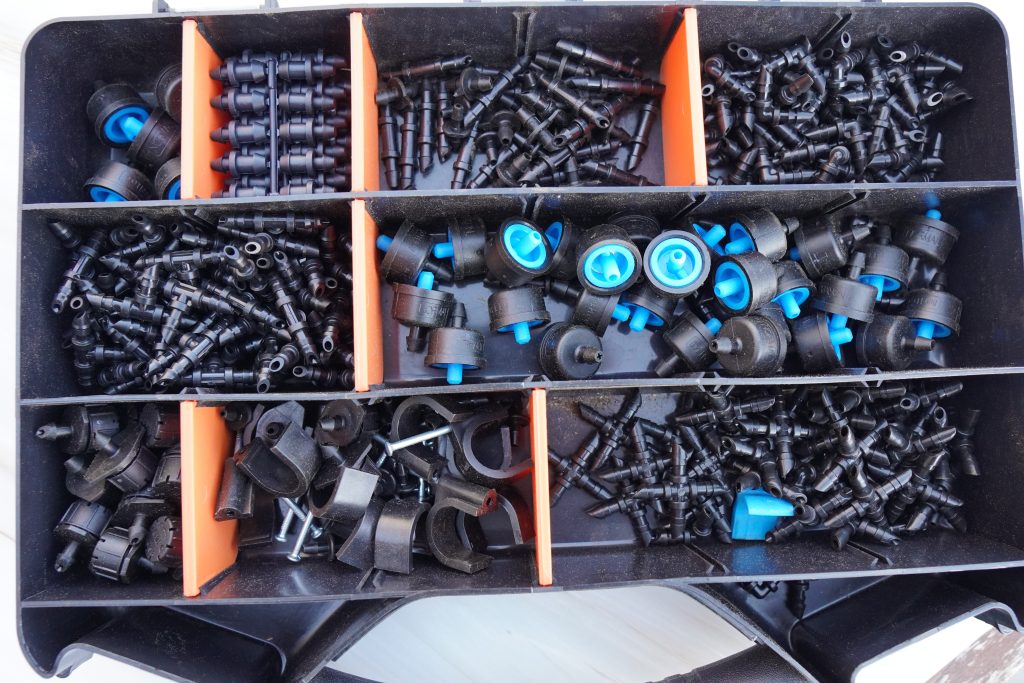
For the 1/4" tubing I use barb connectors. These are the connectors you need to bring the water where you need it in your garden beds. So these are the parts you are going to need and use the most. These are also the lines I need to fix or replace or add the most in my garden. Therefore, I have a full case of spare parts for the connectors:
Do yourself a favor and have an assortment of these ones handy, you can thank me later. 😉
Helpful Tools
I recommend 2 tools to make your life easier for setting up the irrigation system:
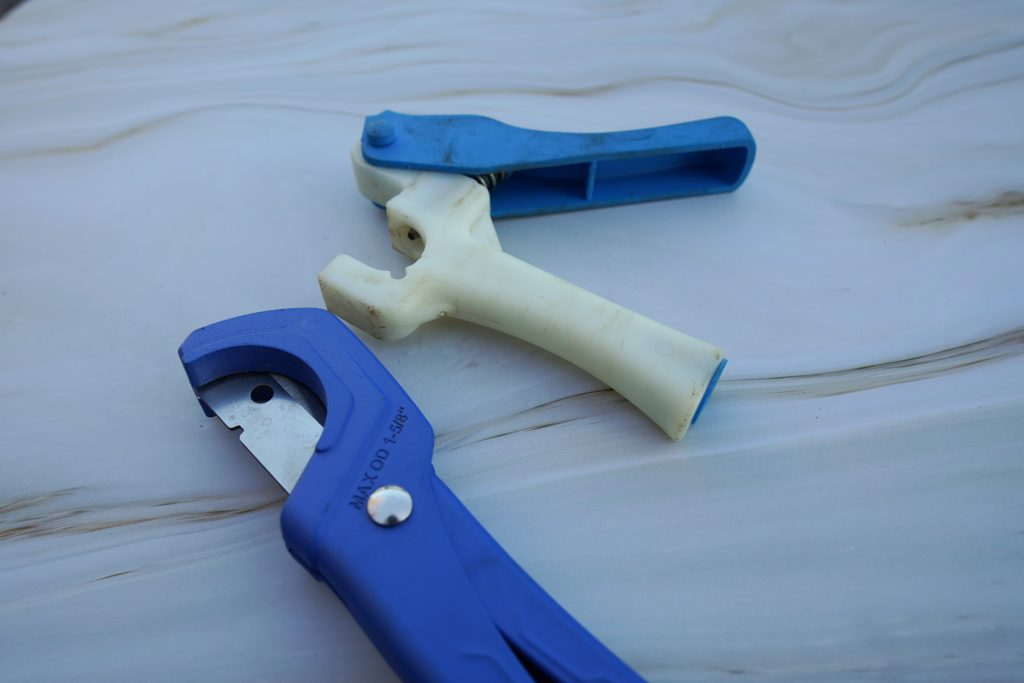
- Hole-Punch (Top): This hole punch is $5 more expensive as the cheap ones, but if you anticipate to put in a lot of in-line emitters like I did it for my flower bed (see section below) your hand and your patience will thank you for it.
- Pipe Cutter (Bottom) : Which makes a clean cut for the larger size tubes without bending it. A clean cut makes it a lot easier to push the tube over the Perma-Loc connectors.
Faucet Connection & Automation Devices
Now let's connect the irrigation system to faucet and set it up with an automated watering timer.
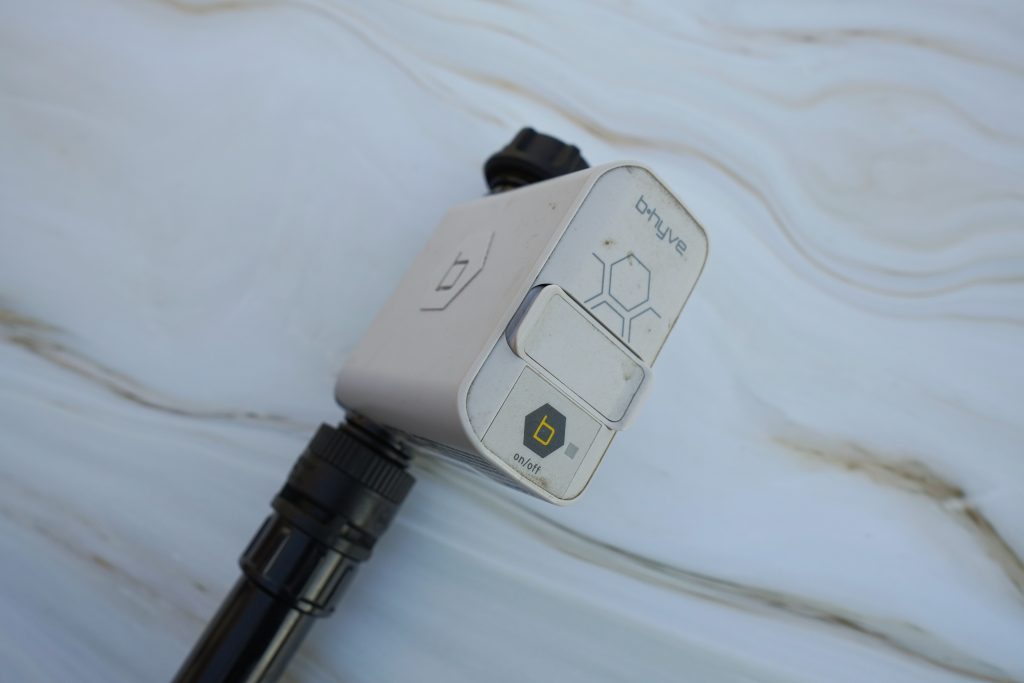
I use the Orbit-B-Hyve Timer which connects to wifi and makes watering accessible from anywhere right on your phone. You can also set up watering programs and let it run automatically. Once you have B-Hyve wifi hub, you can get additional timer if you need more than one watering zone.
One word of caution though, regarding this device: It is designed for lawn care and not necessarily a dense planted garden. Therefore, the smart-watering options the app offers never worked out for me and weren't enough water for my vegetable and cutflower garden needs. So, it is important for you to observe and see in the beginning how long you need the system to run for to water your garden space well. This time will also change with the seasons, so it is really important to be observant and recognize watering related issues early.
You can't just plug in the irrigation line into the timer, you need a few additional pieces to make the connection. This list is order from Tube down to Timer:
---- Tube here ---
- Perma-loc Female hose thread: With the piece you can attach the hose to the next piece, which requires a thread.
- 25 PSI Pressure Regulator: This ensures the correct water pressure to run your system.
- In-line Filter: A filter makes sure that any kind of debris which could enter a line doesn't make it into your timer.
- Back-Flow-Preventer: What the name says, it protects your timer from any kind of back flow.
--- Timer here ---
If you have only one faucet available outside for all your watering needs you want to consider a faucet splitter, so you are able to have also an option for a garden hose or other water access needs. There are options for a 2-way splitter and 4-way splitter.
4. How I set up my garden
Here are my 3 main irrigation configurations in my garden:
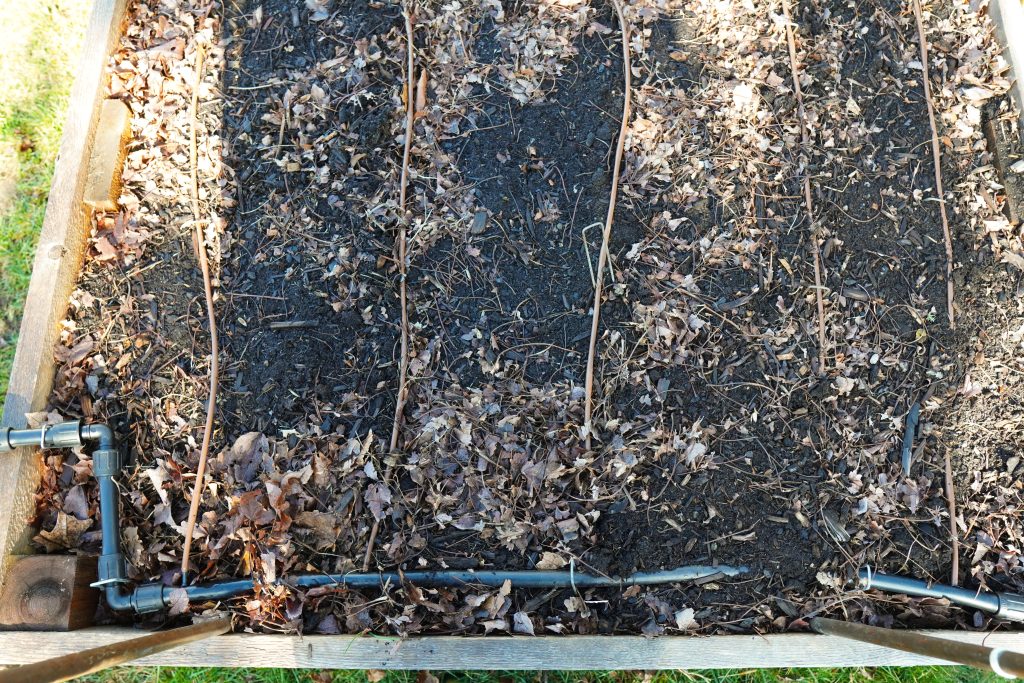
1. Vegetable Beds
For my vegetable beds I follow the same configuration, where I have a mainline leading into the bed with a shut-off valve, so you are in control if this bed gets water or not. From there, I have the supply line continued on one end of the bed and have drip lines connected into it. For a 8x4' bed I use 5 drip lines with emitters every 6", so that my rather densely planted garden beds get enough water.
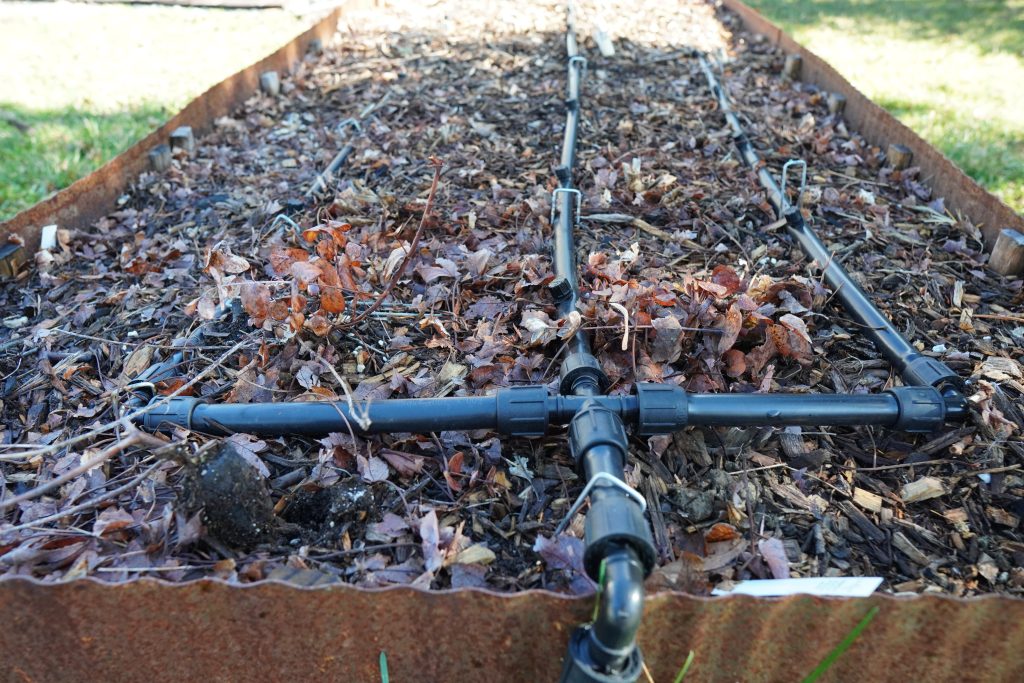
2. Cutflower Garden Beds
My cutflower garden is 2 large slightly raised beds in L-shape. The size of the beds and the fact that I want to grow different plant varieties with different watering needs next to each other called for a more flexible set up. The beds are 3 feet deep and between 20-30 ft long. Too ensure the large bed gets watered evenly, I have 2 supply lines going into the beds from both ends (with shut off valves). From there, I have three 1/2"-poly supply lines going through the beds and use in-line adjustable 360-emitters every 12". These emitters I can adjust to the amount of water each plant need. It allows also for closing off certain parts of the bed if they aren't planted yet. I am very proud of this layout, as it is flexible for my needs.
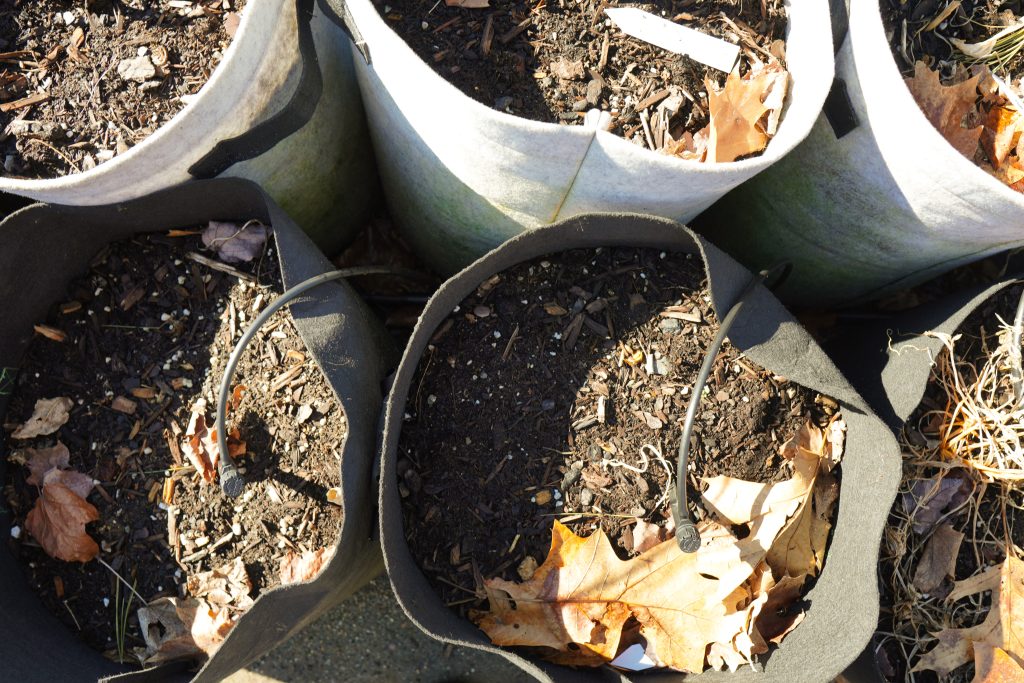
3. Grow Bag Garden
For my grow bag garden where I grow my potatoes, I have a main supply line on the ground in between the bags and plug in 1/4" poly tube in and connect a 360 adjustable emitter with a stake to water each bag.
5. Too Overwhelmed?
If you are still feeling too overwhelmed to start your own irrigation system, you can check out Drip-Depots Kits they provide a great starting point and you are even able to customize them if you want. Otherwise you can also watch my YouTube video, where I explain my irrigation setup in more detail or ask me a question in the comments.
Want to read more on the blog? How about my Soil-Blocking 101?

